大家好,我是六六。今天嘛简单的教大家手写一下vite的核心原理。当然了,为什么会有这一篇文章。在一个月黑风高的晚上,我用vite创建了一个项目跑起来玩玩,天讷,居然这么快!!!,想起公司webapck的项目跑起来需要一根烟的时间我陷入了沉思。所以我决定,一探究竟。现在嘛,我就要来分享给大家。
github地址
点击查看github地址:https://github.com/6sy/write_vite
前言
需要具备以下知识才能更好的阅读哦,但我相信大家肯定都会:
node express框架
vue3
render函数
SFC
AST
正则
ESM模块
搭建本地服务器返回宿主页面
第一步返回宿主页我需要以下操作步骤的:
搭建node服务器,处理浏览器加载各种资源的请求
创建宿主html页面,以及入口js文件
创建vue的实例挂在到页面中(此处先不使用.vue文件)
页面展示正确的内容
// server.jsconst express = require("express");const app = express();const fs = require('fs')const port = 3000;// 处理路由app.get("/", (req, res) => { // 设置响应类型 res.setHeader('content-type','text/html'); // 返回index.html页面 res.send(fs.readFileSync('./src/index.html','utf8'));})app.listen(port, () => { console.log(Example app listening on port ${port}); });
我们先本地搭建一个服务,并且返回`index.html`这个页面
<!DOCTYPE html>
``` 这里我们将`script`标签用`module`的类型。 ``` import {createApp} from 'vue'; createApp({
}).mount('#app')
我们用`createApp`创建一个实例,并且挂在到`#app`上面(之前`index.html`里的)。我们访问这个服务看看效果。居然报错了,这是为什么呢。原来啊,我们服务器根本没有处理`index.js`这个路由情况,所以我们需要加一个路由配置,这里我们使用正则来处理`js`的文件## 处理js后缀文件
// 正则匹配js后缀的文件 app.get(/(.*).js$/, (req, res) => { // 拿到js文件绝对路径 const p = path.join(__dirname, "src\" + req.url); // 设置响应类型为js content-type 和type都要设置 res.setHeader("content-type", "text/javascript"); // 返回js文件 res.send(fs.readFileSync(p, "utf8")); });
好了,我们再打开控制台看看。## 裸模快替换成相对路径这又是为什么呢?其实熟悉`esm模块`加载的都应该能明白,此时`import`只能知道相对地址或者绝对地址路径,对于`import {createApp} from 'vue'`,浏览器是不知道`vue`这个裸模块的含义。所以这个时候,就需要我们来转换一下,将`vue`转换成浏览器能识别的`模块地址`,所以有接下来的操作:- 将`'vue'`模块转换成一个相对地址,例如`'@modules/vue'`,发送相对地址的请求- 服务器识别到带有`@modules`字段的url后,找到此模块的真实地址(`node_modules`下面)给返回出去// 正则匹配js后缀的文件 app.get(/(.*).js$/, (req, res) => { // 拿到js文件绝对路径 const p = path.join(__dirname, "src\" + req.url); // 设置响应类型为js content-type 和type都要设置 res.setHeader("content-type", "text/javascript"); // 返回js文件 let content = fs.readFileSync(p, "utf8"); content = rewriteModules(content) res.send(content); });
// 裸模快地址重新 vue=>@modules/vue function rewriteModules(content){ let reg = / from '"['"]/g return content.replace(reg,(s1,s2)=>{ // 相对路径地址直接返回不处理 if (s2.startsWith(".") || s2.startsWith("./") || s2.startsWith("../")){ return s1 }else{ // 裸模块 return from '/@modules/${s2}' } }) }
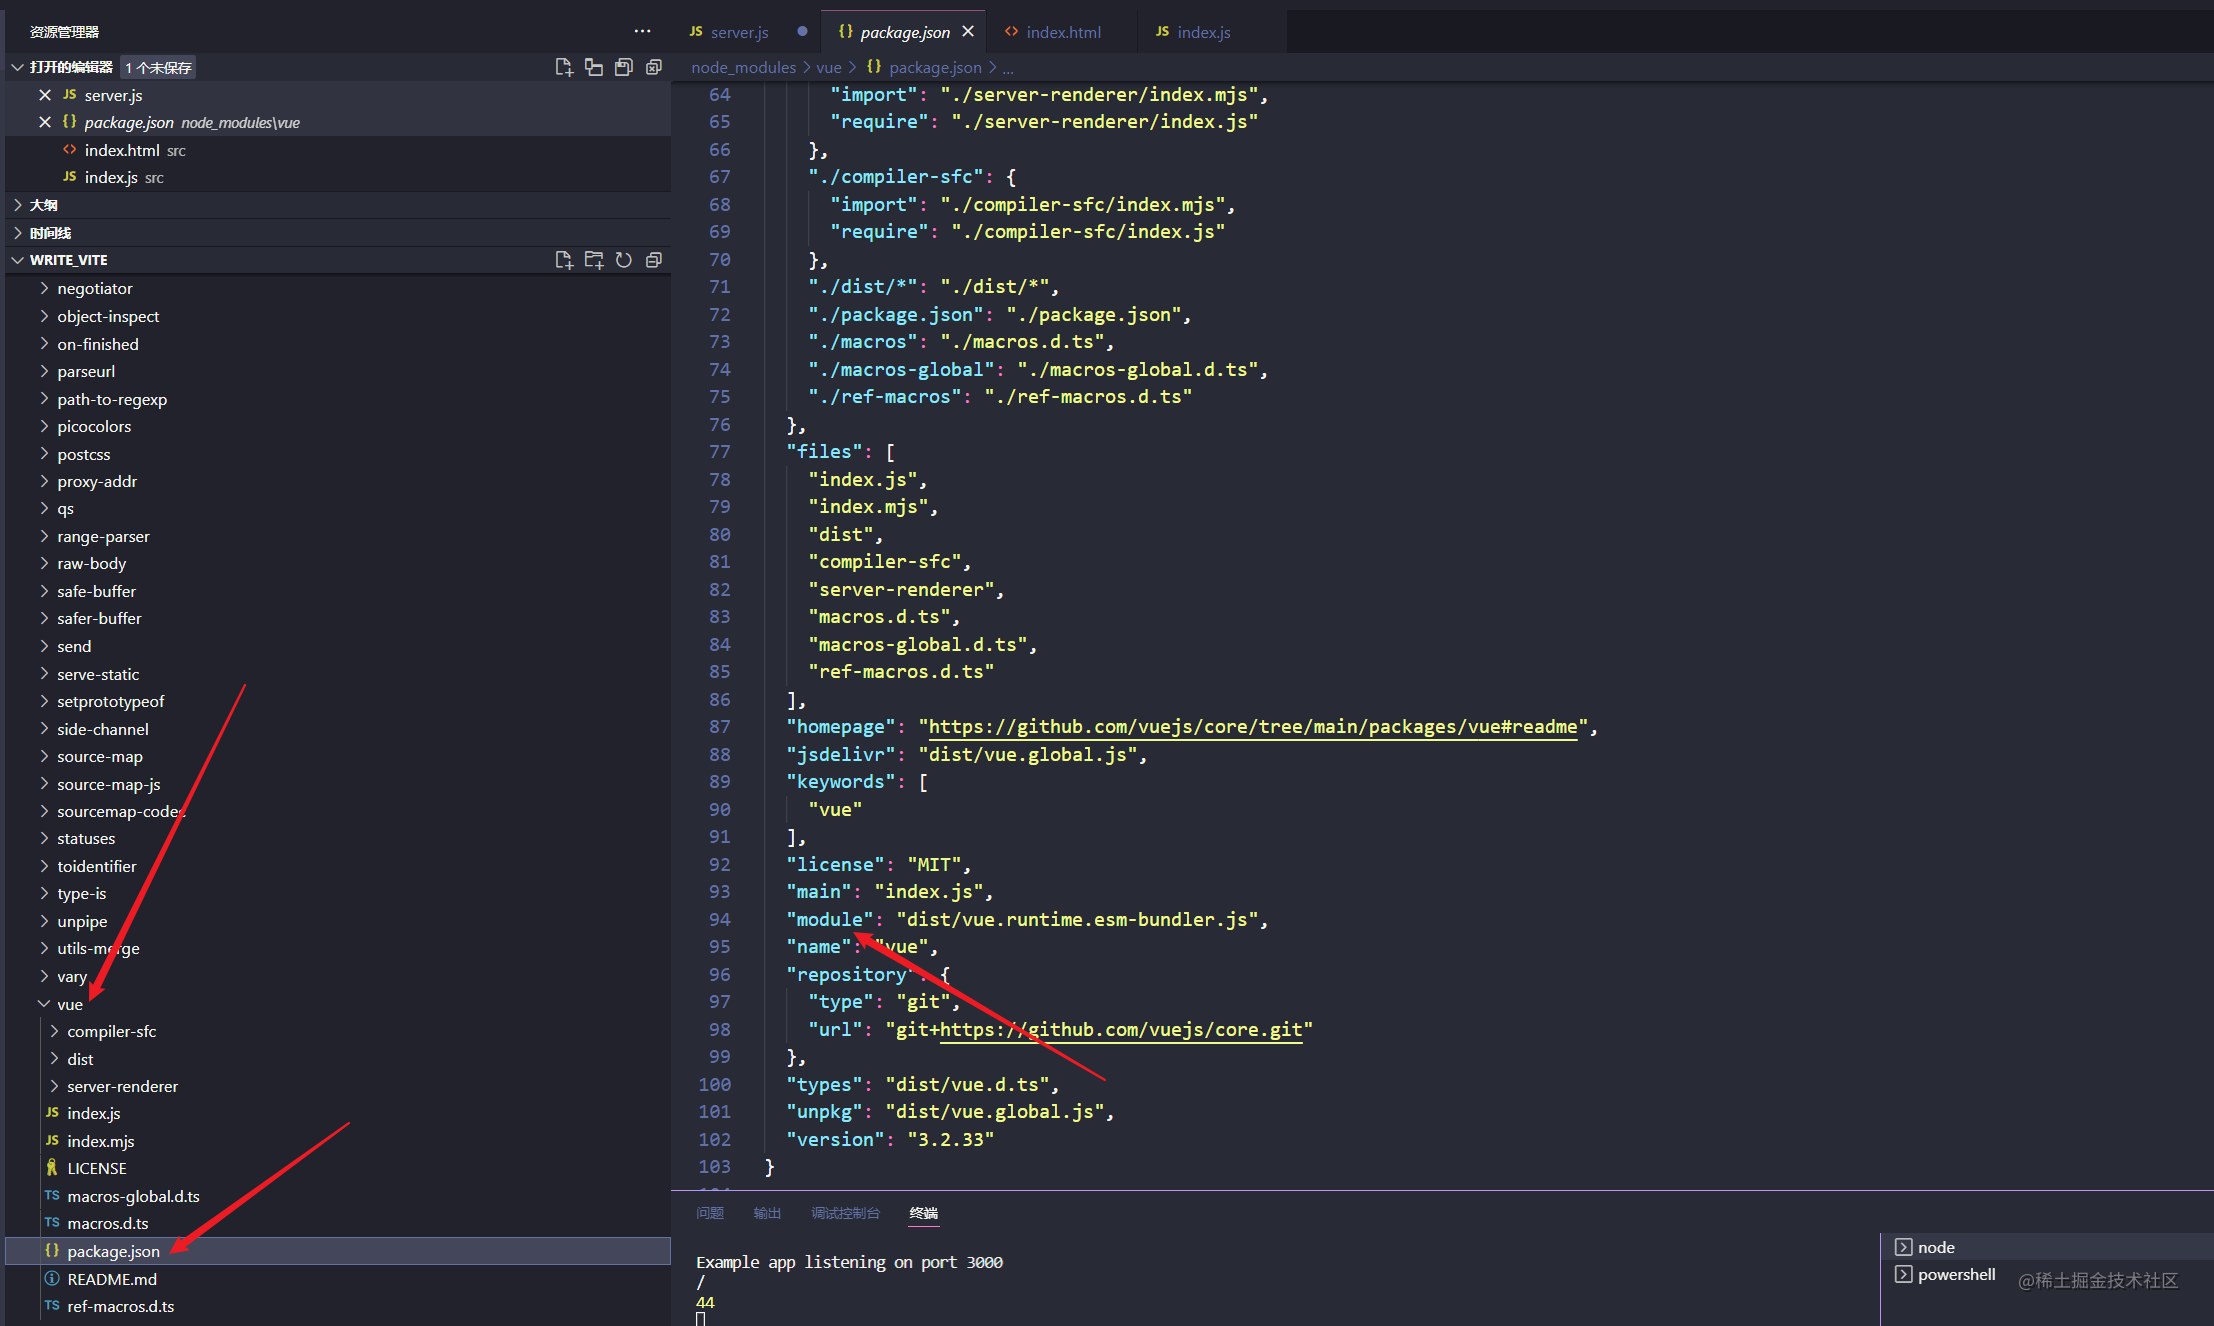
打开控制台看看之前的报错应该就消失了的。这里又出现了一个`404`,其实很好理解的,我们服务端还没开始做处理。在服务端我们要找到真正的文件。那么问题又来了,真正的文件再哪,其实`vue`文件夹里有一个`package.json`文件,里面有一个`module`属性,对应的就是地址啦。
// 处理裸模块 app.get(/^\/@modules/, (req, res) => { console.log(0) // 拿到模块名字 const moduleName = req.url.slice(10); // 去node_modules目录找 const moduleFolder = path.join(__dirname, "/node_modules", moduleName); // 获取package.json中的module字段 const modulePackageJson = require(moduleFolder + "\package.json").module; // 最终相对地址 const filePath = path.join(moduleFolder, modulePackageJson); const readFile = fs.readFileSync(filePath, "utf8"); // 设置响应类型为js content-type 和type都要设置 res.setHeader("content-type", "text/javascript"); // vue里面也可能有裸模快 需要重写 res.send(rewriteModules(readFile)); });
打开浏览器发现,`vue`模块和依赖的模块都已经正常请求完成了。## process变量设置但是控制台有报错,这是因为浏览器没有这个process,所以防止报错我们加一个全局变量。再index.html页面中
``` 所有工作都准备就绪,此时我们再`index.js`中用`render`函数渲染点东西,看看页面是否展示。 ``` import {createApp,h} from 'vue'; const app=createApp({ render(){ return h('div,'111') } }); app.mount('#app') ```
页面已经成功展示出来了。
处理.vue文件流程
我们再工作开发中基本上都不用render函数,一般都是用.vue文件后缀开发的。那现在该怎么操作呢:
服务端读取vue文件内容,转换成AST
解析AST脚本获取export default导出的对象
解析AST的模板(会发送import请求)转换成render函数挂在上面的对象上
解析AST样式(会发送import请求)通过js操作方式挂载到dom上。
此对象最终会挂载在到vue的实例上 上面的步骤可能你会看不懂,下面我们逐步来讲解,首先呢,建一个app.vue文件
<template>{{title}}</template><script>import {ref} from 'vue';export default{ setup(){ const title = ref('你好') return { title } }}</script><style>*{ color:red;}</style>修改一下index.js文件
import {createApp} from 'vue';import App from './app.vue';console.log(App)const app=createApp(App);app.mount('#app');我们先来导入两个对象用于解析sfc和编译模板成渲染函数的。
// 解析sfcconst compilerSFC = require('@vue/compiler-sfc');// 编译成render函数const compilerDOM = require('@vue/compiler-dom');处理.vue文件路由:
app.get(/(.*)\.vue$/, (req, res) => { // 拿到vue文件绝对路径 const p = path.join(__dirname, "src\\" + req.url.split("?")[0]); // 获取sfc文件类容 let content = fs.readFileSync(p, "utf8"); // 裸模快地址重写 content = rewriteModules(content); // 将sfc解析成AST const ast = compilerSFC.parse(content); // 解析sfc脚本 if (!req.query.type) { // 获取脚本类容 const scriptContent = ast.descriptor.script.content; // 替换默认导出为常量 const script = scriptContent.replace("export default", "const _script = "); // 设置响应类型为js content-type 和type都要设置 res.setHeader("content-type", "text/javascript"); res.send( `${rewriteModules(script)} // 解析tpl import {render as _render} from '${req.url}?type=template'; // 解析style import '${req.url}?type=style' _script.render = _render export default _script ` ); } // 解析sfc模板 else if (req.query.type == "template") { // 获取模板类容 const templateContent = ast.descriptor.template.content; console.log(templateContent); // 获取render函数 const render = compilerDOM.compile(templateContent, { mode: "module" }).code; console.log(render); // 设置响应类型为js content-type 和type都要设置 res.setHeader("content-type", "text/javascript"); res.send(rewriteModules(render)); } // 解析sfc样式 else if (req.query.type == "style") { // 获取style类容 let styleContent = ast.descriptor.styles[0].content; // 去掉\r \n styleContent=styleContent.replace(/\s/g, ""); res.setHeader("content-type", "text/javascript"); //返回一个js脚本 写入样式 res.send(` const style = document.createElement('style'); style.innerHTML="${styleContent}" document.head.appendChild(style) `); }});打开控制台看看,代码都完全生效了。这个当中最核心的就是.vue文件里的模板和样式都是需要重新发送请求来解析的。大功告成,这个就是最核心的vite原理啦。
结尾
这篇文章只是最为简单的核心原理手写啦,只是让他们明白一下基本的流程。能学会手写这些其实对于vite我觉得是足够了。好啦,喜欢的记得点赞啦。
原文:https://juejin.cn/post/7096070620105932813